How to Retouch Portraits in Hypic: Beauty & Skin Editing Guide
Portrait retouching is one of the easiest ways to improve the appearance of a photo without completely changing the person. With the right adjustments, you can smooth uneven skin, reduce visible blemishes, improve facial details, and create a cleaner-looking portrait while keeping the result natural.
If you use Hypic for portrait editing, you can combine skin corrections, facial adjustments, beauty effects, and general photo enhancements in one workflow.
Quick answer: To retouch a portrait in Hypic, start with a good-quality photo, adjust the lighting, make small skin corrections, remove distracting blemishes, apply subtle facial adjustments, and finish with a light beauty effect. Always compare the edited photo with the original before saving.
What Is Beauty and Portrait Retouching?
Beauty and portrait retouching means making controlled adjustments to a person’s appearance in a photo.
Instead of completely changing the face, good retouching focuses on small improvements such as:
- Smoothing uneven areas of skin
- Reducing visible blemishes
- Removing distracting spots
- Improving facial details
- Adjusting the overall appearance
- Creating cleaner selfies and portraits
The goal is not to make every part of the face perfect. The goal is to make the photograph look better while preserving the person’s natural appearance.
This is especially important for portrait photography because aggressive editing can quickly remove natural skin texture and make the final image look artificial.
What Can You Retouch in Hypic?
Hypic can be useful for several different types of portrait adjustments. The exact tools available may vary depending on the version of the app.
Skin
Skin retouching can help reduce the appearance of uneven areas and create a cleaner-looking complexion.
However, avoid applying maximum smoothing immediately. Keeping some natural skin texture usually makes the final portrait look more realistic.
Blemishes and Dark Spots
Small blemishes, marks, and distracting spots can be corrected with targeted retouching tools.
If dark spots are your main concern, you can read our guide on how to remove dark spots in Hypic using the AI Concealer Pen.
Facial Features
Portrait editing can also involve subtle adjustments to facial features.
These tools should be used carefully because even a small change to the shape of the face can affect the overall appearance of the portrait.
Beauty Effects
Beauty effects can give selfies and portraits a more polished appearance.
The key is moderation. A low or medium-intensity effect can often improve a portrait without making it look heavily edited.
Overall Appearance
You can also improve a portrait by adjusting brightness, contrast, colors, and other general image settings before finishing the retouching process.
Why Is Natural Retouching Important?
Natural-looking retouching is important because the purpose of editing should be to improve the photograph, not completely transform the person.
For example, removing every pore, line, or small skin detail may create smoother skin, but it can also make the face look plastic.
A better approach is to correct distracting imperfections while keeping some of the original characteristics of the face.
A natural portrait usually has:
- Some visible skin texture
- Controlled smoothing
- Subtle facial adjustments
- Balanced lighting
- Minimal beauty effects
This approach works especially well for selfies, social media portraits, profile pictures, and everyday photography.
How to Retouch a Portrait in Hypic
Follow this simple workflow when editing a portrait in Hypic.
1. Choose a Good Portrait
Start with a clear, high-quality image.
A well-lit portrait gives you more flexibility during editing. If the original photo is extremely dark, blurry, or heavily compressed, retouching may not produce the result you want.
Before editing, check:
- Is the face clearly visible?
- Is the lighting reasonably balanced?
- Is the image sharp enough?
- Are there distracting objects around the subject?
Starting with a good original photo makes the entire editing process easier.
2. Adjust Lighting First
Before retouching the skin, look at the overall lighting.
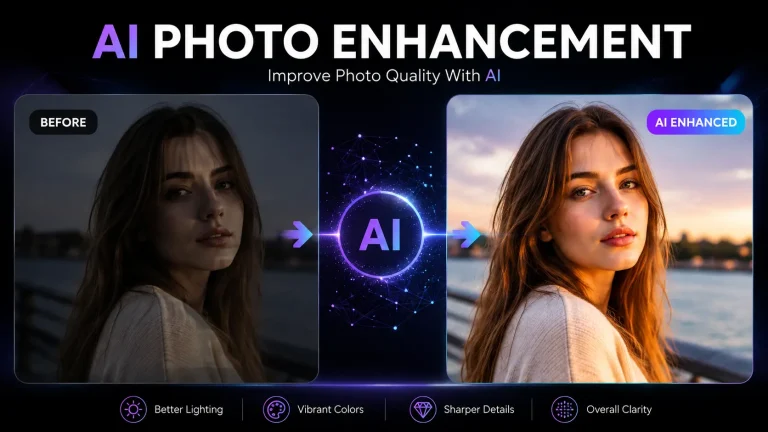
If the portrait is too dark, slightly increase brightness or exposure. If highlights are too strong, reduce them where necessary.
This step matters because skin can look very different depending on the lighting.
Fixing the overall image first can help you avoid over-retouching the skin later.
3. Open the Retouching Tools
Once the basic lighting looks right, open the available retouching or beauty tools in Hypic.
The exact tool names and layout can change between app versions, so focus on the type of adjustment rather than following a fixed button sequence.
Look for tools related to:
- Skin
- Face
- Beauty
- Blemish correction
- Reshaping
- Portrait adjustments
4. Start With Skin Retouching
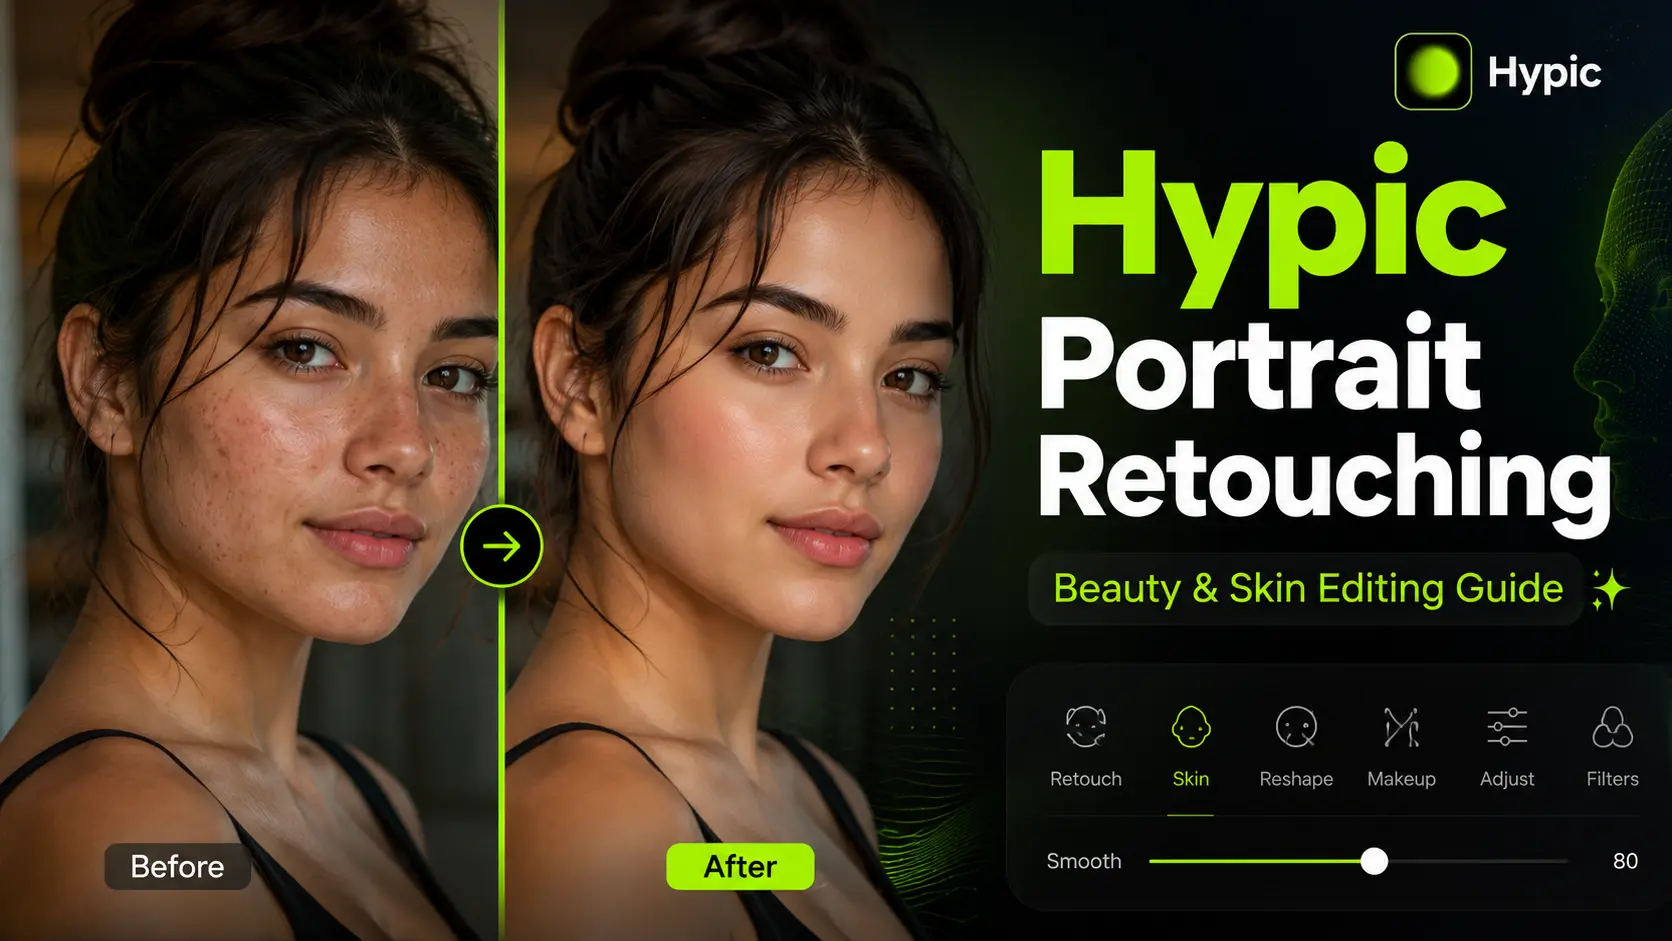
If the skin looks uneven, make a small adjustment rather than immediately applying strong smoothing.
The purpose is to reduce distracting imperfections while preserving the natural appearance of the face.
After making the adjustment, zoom out and check the entire portrait.
An effect that looks good when zoomed in can sometimes look too strong when viewing the complete image.
5. Correct Specific Blemishes
For individual blemishes or dark spots, targeted correction is usually better than applying heavy smoothing to the entire face.
Focus only on the areas that actually need correction.
For example, if there is one noticeable blemish on the cheek, correct that area instead of increasing the overall skin-smoothing effect.
This gives you more control while keeping the rest of the skin natural.
6. Make Subtle Facial Adjustments
If you want to modify facial features, keep the changes conservative.
Small adjustments can improve the balance of a portrait, but aggressive reshaping can make the face look noticeably different from the original.
Before applying a facial adjustment, ask yourself whether the change actually improves the photograph.
If the edit is immediately obvious, consider reducing its intensity.
7. Add Beauty Effects Carefully
Beauty effects can be useful for selfies and portraits, but they should normally be the finishing touch rather than the foundation of the edit.
Start with a low-intensity effect and increase it only when necessary.
This helps prevent common problems such as overly smooth skin, exaggerated facial features, or an artificial appearance.
8. Review the Final Portrait
Before saving your edited photo, compare it with the original.
Check:
- Skin texture
- Facial proportions
- Lighting
- Color
- Beauty effect intensity
- Overall appearance
If the edited portrait immediately looks heavily processed, reduce some of the adjustments.
The best retouching is often the editing that improves the photo without being obvious.
Best Order for Portrait Retouching in Hypic
A simple editing order can make the process easier and help prevent unnecessary adjustments.
Use this workflow:
Original Photo → Lighting → Skin → Blemishes → Facial Adjustments → Beauty Effects → Final Review
Why follow this order?
Lighting affects how the skin looks, so it makes sense to correct the overall image first. Skin adjustments should come before beauty effects, while facial reshaping should be used carefully before you finalize the image.
Finally, comparing the edited image with the original helps you identify over-editing.
Skin Retouching Tips for Better Results
Keep Some Skin Texture
Completely removing skin texture can make a portrait look artificial.
Try to keep enough natural detail so the face still looks realistic.
Fix Specific Imperfections
If only a few areas need correction, focus on those areas instead of applying heavy effects to the entire face.
Targeted editing generally gives you more control.
Consider the Lighting
Skin can appear different under warm, cool, bright, or low lighting.
Always judge the portrait as a whole rather than focusing only on one small area at high zoom.
Don’t Edit Every Detail
Not every small mark needs to be removed.
Some details are part of a person’s natural appearance and can actually make the portrait look more realistic.
Facial Adjustments: Less Is Usually More
Facial adjustment tools can be powerful, but they are also easy to overuse.
For example, changing the shape of the jaw, nose, eyes, or other facial features too much can make the final image look noticeably different from the original.
Instead, make a small adjustment and compare it with the original.
If the change is subtle but improves the composition, it may be worth keeping.
If the face suddenly looks like a different person, the adjustment is probably too strong.
Beauty Effects for Selfies
Selfies are one of the most common situations where beauty retouching can be useful.
A subtle combination of skin correction, lighting improvement, and a light beauty effect can make a selfie look more polished without making it look heavily edited.
If you want to experiment with creative editing ideas, you can also explore Hypic prompts for different photo-editing concepts and styles.
When working with selfies, remember that the best effect depends on the original lighting, camera angle, skin tone, and overall composition.
Beauty Retouching vs Heavy Photo Editing
Beauty retouching and heavy photo manipulation are not the same thing.
Beauty retouching generally focuses on small improvements:
- Skin cleanup
- Blemish removal
- Subtle facial adjustments
- Light beauty effects
- Minor lighting corrections
Heavy editing can involve:
- Major face reshaping
- Dramatic skin changes
- Strong filters
- Background replacement
- Major color manipulation
- Significant changes to facial appearance
For normal portraits and selfies, lighter retouching is usually easier to control and can produce a more believable result.
Common Portrait Retouching Mistakes
Even good editing tools can produce poor results when they are overused.
Here are some common mistakes to avoid.
1. Over-Smoothing the Skin
Too much smoothing removes natural texture and can create a plastic-looking face.
2. Changing Facial Features Too Much
Large adjustments can make the edited person look noticeably different from the original.
3. Using Too Many Beauty Effects
Combining multiple strong effects can quickly make the image look artificial.
4. Ignoring the Original Lighting
Retouching cannot completely compensate for poor lighting.
Start by improving the overall image first.
5. Not Comparing Before and After
Always compare the edited portrait with the original before saving.
This is one of the easiest ways to identify over-editing.
How to Make Portrait Retouching Look Natural
If your goal is a realistic portrait, follow these simple principles:
1. Make small adjustments.
Avoid jumping directly to maximum settings.
2. Work on specific problems.
Correct the areas that actually need attention.
3. Preserve natural texture.
Do not try to make every part of the skin perfectly smooth.
4. Check the complete image.
Zooming in can make small imperfections look more important than they really are.
5. Compare with the original.
If the edited image looks dramatically different, reduce some of the effects.
6. Stop when the photo looks better.
You do not need to use every available tool.
My Approach to Natural Portrait Retouching
When editing a portrait, I prefer to treat retouching as a correction process rather than a complete transformation.
I would first look at the lighting, then fix obvious distractions, make small skin corrections, and only afterward consider facial or beauty adjustments.
This approach keeps the editing process simple and makes it easier to avoid over-editing.
The final question should always be:
Does this adjustment improve the photo without making the edit obvious?
If the answer is yes, keep it. If the effect is distracting, reduce it.
Is Hypic Good for Portrait Retouching?
Hypic can be a useful option for portrait and selfie editing because it combines general photo editing with beauty and AI-assisted tools in one app.
It can be particularly useful if you want to make quick corrections without creating a complicated editing workflow.
However, the best photo editor depends on what you need. If you want to compare Hypic with other photo editing applications, you can explore our Hypic comparisons to see how different tools and features compare.
For users who want a simple workflow, the combination of lighting adjustments, skin correction, blemish cleanup, and subtle beauty effects can be enough for many everyday portraits.
Hypic for PC vs Mobile Portrait Editing
If you prefer editing photos on a larger screen, using Hypic on a PC can provide a different editing experience compared with working entirely on a phone.
A larger display can make it easier to inspect small details in a portrait, especially when checking skin texture or comparing before-and-after results.
If you are specifically looking for information about desktop use, visit our guide to Hypic for PC.
For users who prefer editing directly on a smartphone, the mobile experience may be more convenient for quick selfie and portrait adjustments.
Frequently Asked Questions
Can Hypic Retouch Portraits?
Yes. Hypic can be used for portrait and selfie retouching, including skin improvements, blemish correction, beauty effects, and facial adjustments.
How Do I Smooth Skin in Hypic?
Open the relevant retouching or beauty tools and apply skin smoothing gradually. Start with a lower intensity and check the complete portrait before increasing the effect.
How Can I Make Hypic Retouching Look Natural?
Use small adjustments, preserve some skin texture, correct specific imperfections, and avoid applying strong beauty effects to the entire face.
Can Hypic Remove Blemishes and Dark Spots?
Yes, portrait retouching tools can help correct visible blemishes and distracting marks. For specific dark-spot corrections, targeted tools such as the AI Concealer Pen can be useful.
Can I Adjust Facial Features in Hypic?
Yes, Hypic includes portrait editing options that can be used for facial adjustments. Keep these changes subtle to maintain a natural appearance.
Is Hypic Good for Editing Selfies?
Yes. Hypic can be useful for selfies because you can combine skin corrections, lighting adjustments, beauty effects, and other portrait editing tools in one workflow.
Is Hypic Available for iOS?
If you use an iPhone or iPad, you can learn more about the iOS version through our Hypic for iOS guide.
Can I Use an Older Version of Hypic for Portrait Editing?
Older versions may have different tools, layouts, or feature availability compared with newer releases. If you specifically need an earlier release, you can check our Hypic old versions page.
Final Thoughts
Portrait retouching does not have to mean completely changing someone’s appearance.
A better approach is to improve the photo gradually: correct the lighting, clean up distracting imperfections, make subtle skin adjustments, and use beauty effects carefully.
The most important thing is to preserve some of the original character of the portrait.
With a controlled workflow, Hypic can be a convenient tool for creating cleaner selfies and more polished portraits without making the final image look heavily edited.